About Tutorial:
Take Screenshot of Desktop or Error! This tutorial is well known because
lots of people know about this and many others are still unknown about this
tutorial or method. Basically, people want to share a few of their exact
problems or errors with their Web assistants or PC Administrators who guide
them to fix their issues but it’s hard to explain every error or
troubleshoot to them so they want to take pictures of that error and will
share it. I am not here telling you to go buy a high-resolution camera or a
high-resolution supported Mobile/Phone.
Your Operation System has the facility to take Screenshots or snapshots of
your Desktop or anywhere in your OS. The purpose of sharing this Tutorial is
to provide awareness to those people who are still unaware of this trick or
procedure.
How to Take Screenshot of Desktop or Error?
Many people face problems while installation of programs or some other apps
and they ask me on
Facebook
to resolve the issue but they can’t tell their exact problem so I asked them
to provide me with a snapshot of the error and then they hesitate and asked
“How to do this”, due to which I keep this thing on my mind and made this post
for those.
“So Just follow the given Steps mentioned below and be aware of this trick.”
Step 1:
So here is a sample of the error that I’m receiving and Want to make it an
image/photo to share with someone.
Step 2:
Just Click the “Print Screen” button on your PC
Keyboard. Laptop users may have the “PrtSc” or
“PrtScn” button on their Keypad. (Remember I used “On-Screen Keyboard” for guiding, you don’t need to open it.)
Step 3:
Open “Paint” Program/Application, which is Window's own
program. Windows XP/Vista/7 users locate it to “Start Menu>All Programs>Accessories” and
Windows 8 users follow the below image by clicking “Start”
and Searching “Paint” in Apps Search. (Advanced Users can use
“Photoshop” instead of “Paint”.)
Step 4:
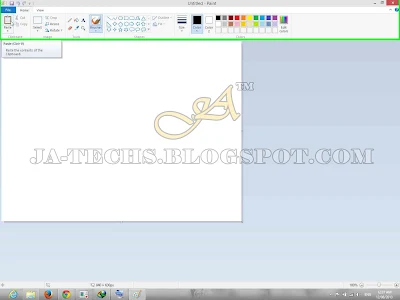
In Paint Application/Program, just use the “Ctrl + V” keys from the keyboard or Click on “Paste” to insert your
snapshot inside Paint.
Step 5:
If so image is Pasted successfully, you may save your
image but if you want to Crop it then move to the next steps.
How to Take Screenshot of Desktop or Error?
Step 6:
So Cropping only error, Click on “Select” tool from top as
shown below image.
Step 7:
Select the area in which you want to save it as an image by “Holding Left Mouse Click”.
Step 8:
Time to click on the “Crop” Tool button next to the
“Select” tool.
Step 9:
Finally, press the “Ctrl + S” keys from the keyboard to save
it as an image to anywhere in your System.
Step 10:
Open this image to Windows Photo Viewer or any associated program to View it.
Feedback and Support!
If you like this Tutorial and Blog then please post a "Thanks" comment to
encourage me.


