This Tutorial is for those who are facing problems during converting the
files into .CAB files, so here I will show you how to create .cab file for
Windows SP2 and SP3. It is probably required when people edit their
Windows Load Screen files i.e "ntkrnlmp". The file is
basically located inside Windows XP Setup CD, where inside
I386 folder consists "SP2.CAB" file and Windows Service
Pack 3 consists SP2.CAB and SP3.CAB files,
which may easily be extracted using Winrar, 7Zip and other relevant
software.
But when users complete their editing with ntkrnlmp file etc and
want to reconvert it into SP2.CAB or SP3.CAB files they will
start facing problems but many of the users are known about this that how
can they convert it. So this Tutorial is for those who are unable to do
this.
The word used in this article as SP referred to Service Pack, which are
updates versions for Windows by Microsoft for adding more features to any
existing Windows. You can follow this article to rebuild cab file for
Windows SP2 and you can do the same by creating SP3 as well.
How to Create .Cab file for Windows SP2 and SP3!
So I have made this Tutorial to help those computer users and I have
successfully performed these steps without getting any trouble so you have
to just require to perform the below steps, each step contains a
screenshot for quick guidance.
Step 1:
Go to Start Menu, as shown in below image.

|
|
Creating cab file for Windows SP2 and SP3
|
Step 2:
Type iexpress and press Enter button or click on
IExpress as mentioned the below image.

|
|
Creating cab file for Windows SP2 and SP3
|
Step 3:
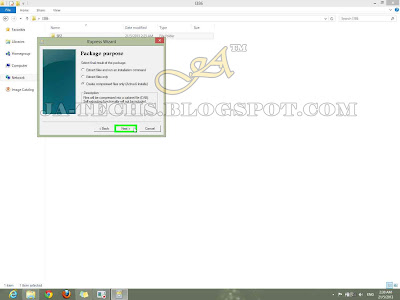
Then IExpress Wizard will be open, you have to click on
Create compressed files only (ActiveX Installs) then just click on
the Next button.

|
|
Creating cab file for Windows SP2 and SP3
|
Step 4:
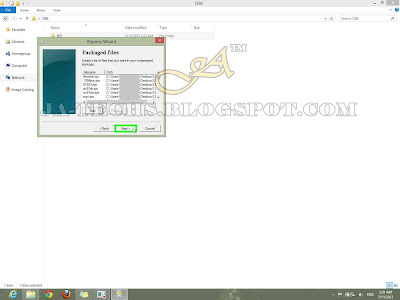
Now it's Packaged files process, just click on
Add button to insert files.
Step 5:
After clicking on Add button, a new window will be open just
browse/go to the directory where your SP2/SP3 files are
located, or the files which you want to convert into .CAB, then
just select all files using Ctrl+A and then Click on
Open button as shown in below picture.
How to Create .Cab file for Windows SP2 and SP3!
Step 6:
Now just click on the Next button to proceed.
Step 7:
Click on the Browse button to name the file.
Step 8:
Just name the file SP2 or SP3 or any other, then hit
the Save button.
I recommend saving the file in the same directory where all Convertable
files are located because sometimes saving files to different locations
causes an error.
Step 9:
On the next screen just ensure that both options are
unchecked and proceed with the Next button.
Step 10:
On the Self Extraction screen just click on
Don't save and proceed with the Next button.
Step 11:
The next screen is Create Package, just hit the Next
button to start the conversion process.
Step 12:
This is the process conversion screen, just wait for a few seconds or a
couple of minutes to complete the process.
Step 13:
After finishing Step 12, you will get
Your package has been created, just click on the Finish button.
Step 14:
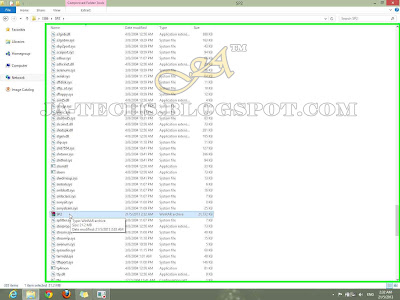
Just go to the directory where you have saved your
.CAB package file, below is my converted file which is located
in the same directory where the original files are.
That's it for this tutorial regarding how to create .cab file for Windows SP2 or
SP3.
Feedback and Support
If you like this Tutorial and Blog then please post a "Thanks" comment to
encourage me.


